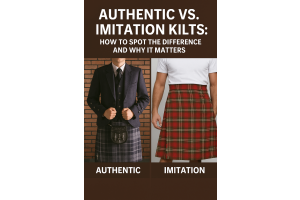



Dressing up for a special occasion can be a fun experience, and even more so when you’re wearing a traditional Scottish (or Irish) kilt. Although kilts are quickly becoming more mainstream and casual, formal options are still the go-to for anyone who wants to flaunt his cultural heritage.
However, putting on a full dress kilt with all of the accessories is a bit more complicated than wearing a three-piece suit, so it’s imperative that you understand what all is involved. Today we want to go over each component so that you know what to expect and you’ll be sure to look your best.
Anatomy of a Kilt
There are a few unique pieces that you have to know before we get started. Formal kilts are far more than just a bit of cloth you wear around the waist. Knowing what each piece is (and what it’s called) will help expedite the dressing process. In addition to the kilt itself, you have:
Hose - These are essentially knee-high socks. Make sure that they go above the knee when fully extended, as you’ll pull them down below the knee to get the right style.
Flashes - These pieces are garters that come with flaps of tartan material. The flashes should match the design and color of your kilt, so be sure that they do before putting them on. If they don’t match, it will look weird.
Ghillie Brogues - The shoes you wear with a formal kilt are unique, and tying them up can be a bit tricky, so pay attention when we go over that part.
Sporran - This is the piece that hangs on the front of your kilt. For formal wear, it’s usually made of fur.
Kilt Pin - This pin can be used to show off your family crest or heritage, or it can simply be an accessory to weigh down the corner of your kilt.
Jacket and Vest - These pieces are uniquely designed to complement the kilt, so don’t assume that you can wear any coat or vest.
Sgian Dubh - Traditionally, men would have a small knife tucked into their hose, presumably so that they could look more badass. This piece isn’t essential, but why not go all the way when dressing up?
How to Get Dressed the Formal Way
If you haven’t put on a formal kilt before, this process can seem a little complicated at first. However, following these steps will ensure that you can master it in no time.
Start With the Hose
Although you can put the kilt on first, it’s usually easier to put the hose on beforehand. You have better access to them, and it’s much simpler to attach the flashes.
First, pull the hose all the way up past the knee. Then, attach your flashes, usually about three fingers length below the bottom of the knee. You can wear your flashes to the front or the outside, but make sure that they match, regardless of which route you take.
Once the flashes are on, pull the top of the hose down until it reaches about halfway down the flash.
Tying Your Brogues
Since you have the hose on already, it’s best to put the shoes on as well. Fortunately, kilts wrap around your waist, so you don’t have to worry about extra difficulty because your shoes are already on.
As you’ll notice, the laces are incredibly long - this is so that you can tie them around your calf. There are a few options here: you can do the high front tie, the side tie, and the low tie. All of them follow the same procedure, but the difference is where you tie the final knot.
Before you begin, make sure that your laces are tight and the same length. Tie half a knot between them to add tension. Next twist the laces around each other three times.
Once that’s done, wrap the laces around the back of your leg, just above the ankle. Bring them to the front, and then wrap around the back again. For the high front tie, leave plenty of space between wraps. For a low tie, tighten things up.
Bring the laces to the front, and tie a simple knot. You can do a shoelace or a square knot if you like - it depends on the look you want. For a side tie lace, the knot will be on the outside of the leg instead.
Putting the Kilt On
Open the kilt and bring it behind your body - the lining should be against your waist. Start with your right hand and bring it to your left hip. There is a slit for the belt to go through, and a buckle to fasten it.
The left buckle will take most of the weight of the kilt, so tighten it enough so that the whole thing doesn’t slip off.
Once the left side is secure, take the front apron and bring it to your right hip. For formal kilts, there should be two straps and buckles. Start with the upper buckle, which will again take most of the weight. The bottom strap is mostly decorative.
Check yourself out to ensure that the kilt has an A shape to it and that it hangs in the middle of the knee. If necessary, adjust the waist to make it more comfortable.
Attaching the Sporran
If you want to make this step easier on yourself, fasten the strap on the front of your body and then spin the sporran around. However, if you want to be technical, there should be two loops on the back of the kilt, where the strap should go through. Attaching it this way requires you to fasten the buckle behind your back, which can be tricky.
A tip for hanging your sporran - Tuck the chain above the buckles on the side so that it doesn’t slip down while you walk. The sporran should be about a hand’s length from the top of the kilt.
Attaching the Kilt Pin
If you decide to have a kilt pin, make sure that you hook it to the front apron only, as it’s thick enough to prevent tears and fraying. The pin should sit about four inches from the hem of the kilt.
Tucking Your Sgian Dubh
The knife should tuck into the hose on your dominant side. So, if you’re left-handed, tuck in on your left leg. The handle should be sticking out.
Wearing the Jacket and Vest
Putting these pieces on should be a breeze, assuming that you’ve worn a jacket and vest before. We highly recommend wearing a bow tie and a white button-down shirt underneath to complete the ensemble.
And that’s it! Now you’re ready to wow your friends and family and finally look impressive in all of your pictures. Contact Kilt Rental USA to find the right fit and design for your needs.